Alternative Process prints are created by contact printing which means that the printing paper is in direct contact with the negative and the final image is the same size as the negative. The traditional method of obtaining this large negative is with a large camera. The use of a view camera is the ultra orthodox method of creating this negative. You want to make an 8 by 10 inch print? Get a camera that can hold a piece of 8 x 10 inch film. Users of the view camera are the true purists of the photographic art. I say this because I used view cameras exclusively for over thirty years. They make photographs of traditional subject matter using traditional films, developers and printing methods. They are nice people willing to answer questions for those that wish to be initiated into the culture of the view camera.
A word of warning; once you see your intended image life size, upside down and backwards on a ground glass, your photographic world will be changed forever. I can't explain it to you if you have never seen your image one a big ground glass. Once you have seen it, I don't have to explain it to you.
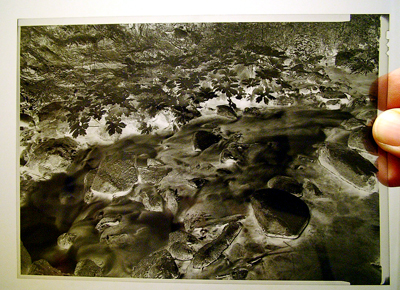
A 5x7 film negative
The In Camera Negative
For the most part, my choice of large format film was TMAX 400 in either 5x7 or 4x5 film. I also played around a bit with some Agfa and some Ilford film, but I do exhort you to stick with one film, one developer. So, I pretty much stuck with the TMAX 400 and metered my scenes with a digital spotmeter. Generally, I set my shadows at Zone III and let the highlights float as high as Zone XI before declaring an N-1 situation. That’s right, Zone XI. When making a negative for platinum printing, you sneer at the highlights and say, “Ha, I am platinum printing, go ahead and be specular. I will tame you with an alternative process.” Worked every time for me.
I developed my negatives in D-23, two bath variety (The whole story about divided D-23 is covered at Ed Buffaloes’s website, www.unblinkingeye.com in incredible detail. It’s exactly the level of detail and obscure technical points that delight large format photographers). I develop the film for eight minutes (normal) in Part A and three minutes in Part B. A quick dip in the stop bath, a thorough fixing (with hardener), hypo clear and wash. I did hear the audible gasps when I wrote the eight minute development time, but remember folks, negatives for platinum printing are different than negatives for silver printing. You can’t get away with those namby pampy, weak negatives. You must have manly negatives that are robust, vital, thick and full of details. Negatives that will leave your fixer with little to do.
The Out of Camera Negative
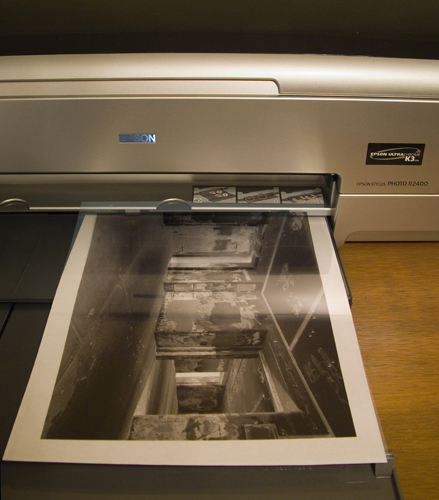
A big negative can also be created outside of the camera. There are two ways to accomplish this task. The first way is using photochemical processes. This alternative has been around a long time. A miniature negative (that’s what 35 mm or other roll film negatives were originally called) was projected on a sheet of film to create a film positive. The film positive was processed, and then contact printed to another piece of film to get a film negative for the alternative process print. I had other uses for this type of technology when I first started making enlarged negatives, so I know how it’s done. It seemed to me to be a whole lot of work. When I found out about the digital negative, I said, “Gosh, golly that sounds like a wonderful thing.” Really. I said just that.
I made my first digital negatives at the end of the last century. (That would be in NINETEEN ninety seven or so – you consarn, young whippersnappers…) I learned the process from Dan Burkholder’s first book on digital negatives and assisted at a workshop on this topic sponsored by LensWork. At that time, the process involved a photoshop file as input for an imagesetting machine. The output was a lithographic film negative. I made several portfolios in this fashion. It worked quite well. The only problem was the level of precision required the image setter machine to operate at a very high resolution. This created problems for the commercial operator because image setting machines usually operate at a much lower resolution than required for digital negatives. As a result, for the commercial shop (even at the good ones) the results were problematic. Happily, advances in desktop printing have made the creation of negatives using overhead transparency material a practical matter.
Since there are people out there who make their living instructing photographers in the creation of desktop negatives, I will not reveal obscure keyboard commands, secret algorithms and the sixteen keys to successful use of the healing brush that are critical to the creation of digital negatives. I will, however, make known some things that were important to me.
 One must create step wedges to determine what transfer curve and blocking color. Twenty curves that didn't work, followed up by five that got me exactly where I wanted. The important fact is this: Inks and pigments are NOT created equal. They transmit UV light differently. A reflection densitometer is a real advantage in determining the correct curve for your digital negative. For X-Rite densitometers, the dot area percentage is the same as the percentage readings in photoshop.
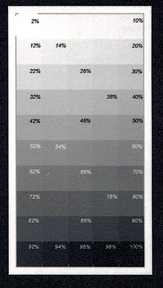 The testing does not go away. It’s just that you do it one time for each paper, sensitizer combination instead of testing each time you make a print. It is still a chore to do, but the successful results can be applied to many, many prints.
The result is that if you are working on a portfolio (as I do), I can make more prints quicker than I have in the past. This means I can finish my portfolios quicker and move on to the next project. I can complete more projects.