Usually the next day, I am ready to print my negatives. First step, which I must admit is a hold over from my days of printing with Palladio paper is to humidify the coated paper. So, I go back into the kitchen and start the tea kettle again. I then steam the coated paper on both sides. The same rule of thumb applies. As soon as the paper sags in the middle, it has enough moisture in it. It then gets a few minutes rest time before exposure.
The next step is to align the negative over the coated section of the paper and then secure the negative and coated paper for printing. I use a NuArc vacuum frame to hold the paper and negative together. I have a vacuum gauge on the frame inlet. It is set for 25" of Hg. I was able to find this set up used for just about the same price as a really nice spring back frame. For those that are really technically minded there is a relationship between the ability to reproduce a highlight value and amount of vacuum held on the frame. The higher the vacuum, the better the highlight detail is rendered.
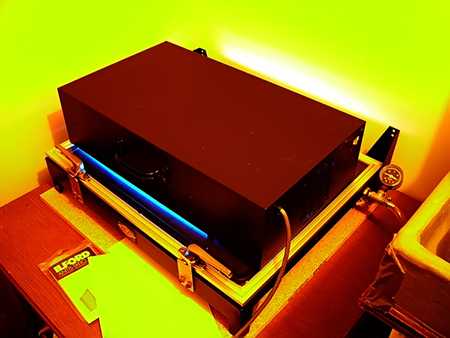
Now to expose the print. My UV light source was purchased from the Palladio Company when I first started platinum printing. It takes four minutes to print maximum black through a clear piece of Pictorico OHP film. That is the correct exposure for all my platinum palladium prints. My trusty (old) GrayLab timer is accurate enough for measuring these exposures.
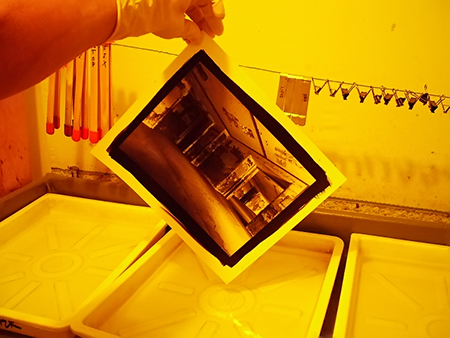
Psychedelic! Ah, fans of the sixties, we have here an amazing unretouched photograph made with a combination of UV and Yellow light. This is really far out. Noisy, too. With the vacuum pump and the cooling fan on the ballasts, this is not a quiet process. Note the Ilford antistaticum cloth. I use it for every exposure. Clean, static free glass is a requirement. Especially in a house with three cats. Four minutes later, the exposed print is ready for development.
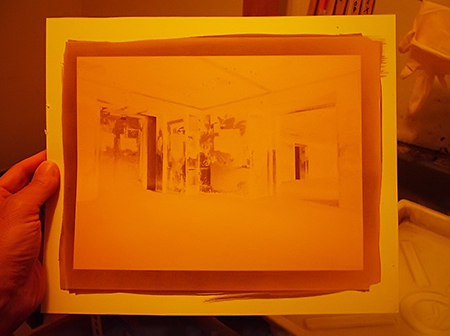
This is what a properly exposed platinum print looks like after exposure and before developing. Platinum printing is called a "printing out" process meaning the image is formed during exposure of the negative. It takes four minutes to print maximum black through a clear piece of Pictorico OHP film. That is the correct exposure for all my platinum palladium prints. My trusty (old) GrayLab timer is accurate enough for measuring these exposures.
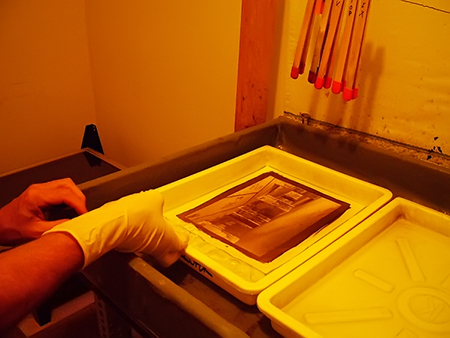
I develop my prints in warm (98 -108 degrees F) Potassium Oxalate developer for about a minute and a half. It may not need that much time, but that's what I give it. The intial development is instantaneous, so there is not gradual appearance of the image that is characteristic of the silver print.
I tilt the developing tray to get the developer welled up at the far end. I then slide the print into the tray just until the edge of the paper touches the developer. I then lower the high end of the tray quickly. The developer rolls over the print. I have just about lowered the tray completely. You can see how fast the development has occurred.
Development is complete according to the clock, so the print is drained of developer. Once the drops from the lowest corner take longer than a second to fall off, the print is ready for the rinse bath. I use distilled water for my rinse bath. There may not be a need to because our tap water is very soft, but it's a hold over from days gone by.
I do everything by the clock. Elimination of variables is the key to consistency. Boring and inflexible, but that is the key to successful darkroom work in any medium.
I rinse the print for a minute. Rinsing consists of repeated dunkings of the print in the plain water and letting it drain off the surface of the print. I also agitate the print when completely submerged just to keep from getting bored.
After it is drained completely, you can move it on to the first of the two clearing baths.
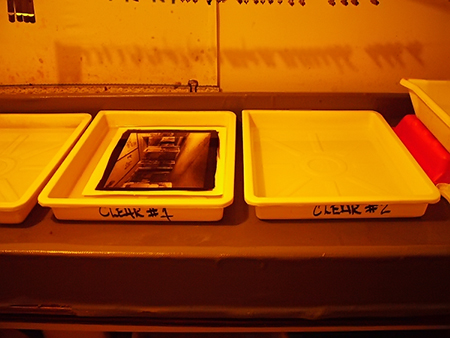
Well, the print is now resting comfortably in the first of two five minute clearing baths. I use EDTA and some sodium sulfite. There are other formulations, but this is simple enough for me. The reason for two baths is that this solution will lose its effectivity. I usually change out the first bath when it starts to look like weak iced tea. Number two bath becomes the number one bath and a fresh solution becomes the number two bath.
There might be the occasional dip and dunk or tray rock throughout the clearing phase just to keep the print from going to sleep. From the clearing baths on to the holding tray.
After the holding tray, the prints are washed. I use a Kodak tray siphon. I figure if the Kodak tray siphon was good enough for Edward Weston, it should be good enough for me. Squeegee the prints to remove some of the water and then the prints go back on the screens to air dry over night.
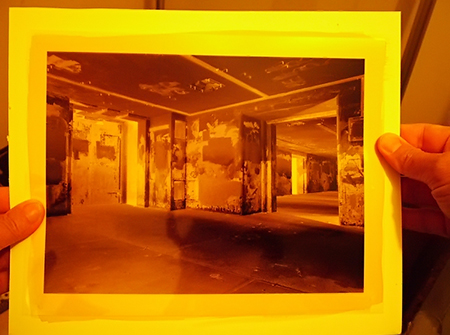
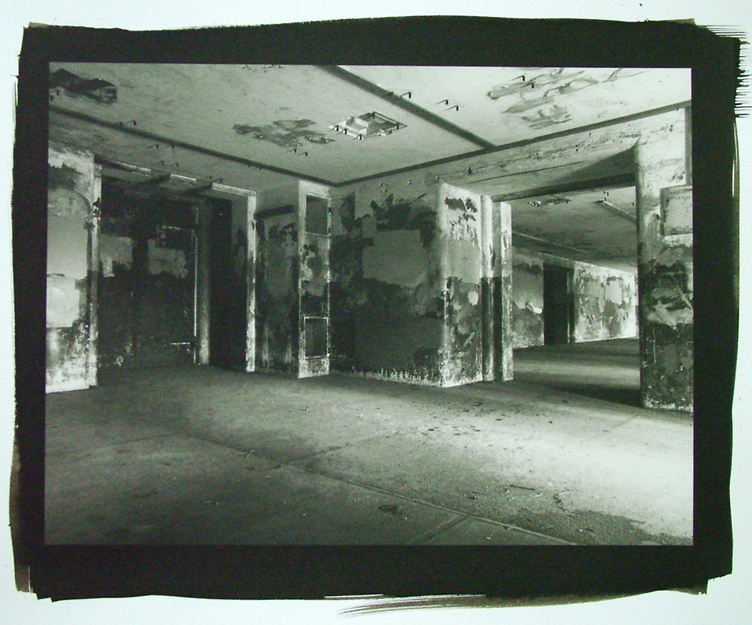
Here is copy of the final print. Note the brush mark across the bottom.